Doll Millinery – Great Fun

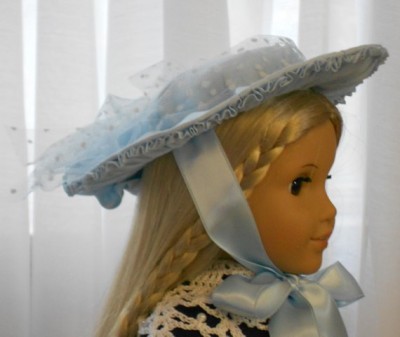
Inspired by an early 1800's French Doll Hat

Inspired by an early 1800’s French Doll Hat

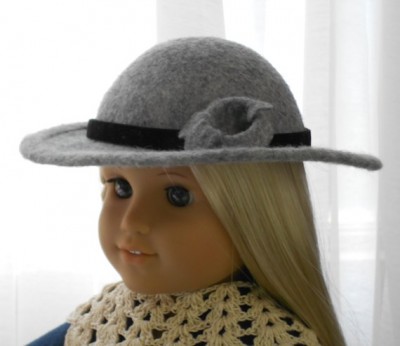
Gray wool School Hat

Gray wool School Hat

I am having such great fun making my doll millinery.  Growing up we wore hats to church every Sunday and had lots and lots in every color with beautiful flowers and accents.  I guess my love of hats has carried over into my doll world.  The hats are made using traditional millinery techniques of “Flat Pattern” and “Blocking”.

Flat Pattern uses buckram and milliner’s wire to shape the hat which is then covered with fashion fabric and accents.  Baby Blue was inspired by an early 1800’s French Doll Hat.


Blocking, my newest endeavor, is shaping wool felt or other materials over a form, or “Block”.  The fabric is stiffened to hold its shape.  The Gray School Girl” hat is blocked from a gray wool felt.  It has a wired brim to help keep its shape.  Most of my hats have a head circumference of 12″ but I can create any size.


All of my hats are for sale in my Etsy Shop called Cape Cod Curiosities


Inspiration Everywhere – Puerto Rico

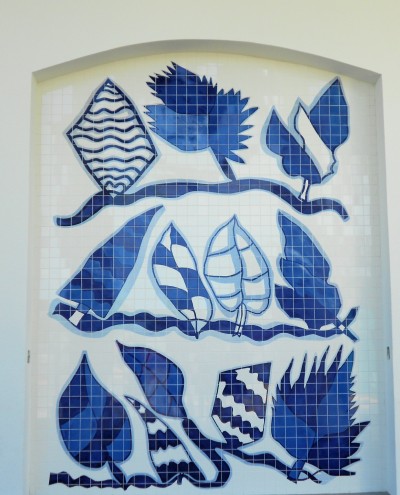
Bacardi Distillery - Mosaic

This simple but beautifully graphic mosaic of ceramic tiles adorns the exterior wall of the Bacardi Distillery in Puerto Rico.  Photos of thier National Headquarters in Bermuda also show a similar blue and white mosaic on an exterior wall.

The first thing that came to my mind was what a wonderful idea for a “Pieced Quilt”.  The use of various shades of blue tiles gives it depth and texture – a real achievement on a shiny ceramic surface, hey.


Ever Curious,

Linda

A Cape Cod Curiosity

    Here is a basket of Cape Cod Gold, the infamous Quahogs.  They are known in other places as Cherry-stones or Little-necks, but nevertheless, they are especially wonderful when freshly dug from the sand.

Early winter is the best time to dig, when the water is very cold and the clam muscle is nice and firm……Yum!

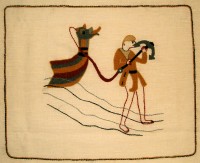
A few years ago I took a City and Guilds embroidery course and one of our requirements was to study the Bayeux Tapestry and recreate a tiny section using the two stitches that were originally used back in 1066.  The Outline Stitch is one that I was familiar with but the Laid Work Stitch was new to me.  It is essentially a secured basket weave which makes it very durable –  probably why the Bayeux Tapestry has survived the ravages or time.

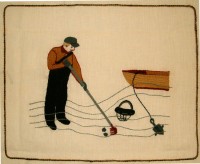
The other part of the lesson was to create our own scene using the same techniques, materials and stitches.  I chose to depict a man digging clams – Quahogs to be sure.

Bayeux Tapestry


                                                                                  Digging Clams


These are the pieces that I created.  The Bayeux one depicts a warrior setting an anchor as they ready their invasion.  Digging Clam, well it’s self explanatory – note the clam basket.  The materials used were a linen base and wool thread – the type used for needlepoint worked great.  For those of you who dabble in embroidery and are not familiar with Laid-work, grab your embroidery dictionary, your hoop and give it a go.  It creates a nice dense, textured and durable surface.  Oh, time to go, Hubby just pulled some Quahogs on the half shell from the broiler – wish you were here.


Ever Curious,

Linda


New Fabric Painting in the Works

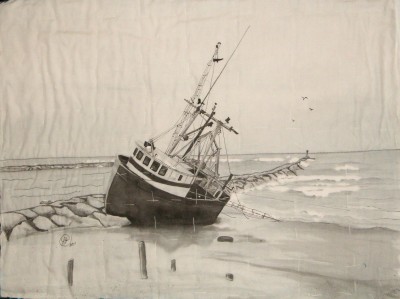
Dragger on the Rocks

Here is my latest fabric painting…in the works!

The picture was painted on white cotton with black fabric paint (Dye-Na-Flow) that was thickened with Sodium Alginate.  The bright white areas, like the seafoam on the waves and the wheelhouse, were masked with a commercial brush-on masking gel prior to painting. This step helps to preserve the brights no matter what I do.

After the painting was finished and the alginate and mask were washed out, I started to hand quilt which is why there are basting stitches running through the piece.  The hand quilting thread and stitches were too large in proportion to the lines in the design.  I pulled it out and began to machine quilt – not my favorite – so here it sits waiting for me to get inspired again to get quilting.  Even though it isn’t finished, I thought that you might like to see another example of painting on fabric with thickened fabric paints or dyes.

Ever curious,

Linda


The Bride’s Box

In many countries there is a tradition of giving a Bride-to-Be a keepsake box for her wedding memories. 

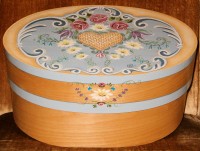
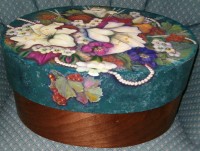
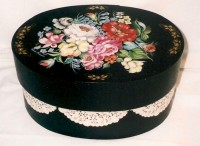
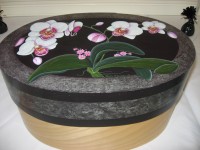
For many years I have been painting Bride’s Boxes for the young ladies joining our family (we have all boys).  The Boxes are a traditional Bentwood with a deep cover painted in acrylics.  The interior is padded and lined with white satin and personalized with the names of the bride and groom and the wedding date.  I try to make the design of the boxes fit the personalities of the brides.   I just finished Emily’s today so I thought I would share them with you. 

Here are a few 


Doll Clothes for American Girl®

Sunshine’s Boutique

Well, finally here it is!  Introducing a small line of doll clothing and accessories  for the

American Girl Doll® 

They are one-of-a-kind and hand made  

I am having a great time researching and designing these little gems, and would like to share them with you.  I am not much on making quantities of anything so if you see a piece that you like but it is sold, please contact me and I will try my best to fulfill your wishes.

I grew up wearing hats so you will find that a hat  is often included in an ensemble – a must have for any little lady!  I will be offering  just for fun hats  as well as options for ensembles on The Mad Hattery page (Coming soon).

Take a moment and check it out – your comments are always welcome!

Sunshine’s Boutique

Ever curious,

Linda

Coming Soon ! – Sunshine’s Doll Clothing Boutique

Sunshine’s Boutique

Limited Edition Clothing for the American Girl ® Doll

Hand Made Contemporary and Period Clothing & Accessories for 18″ Dolls

The Story

My Grandaughter used her Christmas gift money to buy an American Girl Doll.  I thought it would be fun to make her some clothes and accessories, but of course, I needed a doll to make sure the clothes fit.  You can probably guess what came next.  As it turns out, we both had bought the same doll “Julie” the girl from 1970’s California.  I have re-named her “Sunshine” and named the clothing boutique after her. 

I am having such fun designing and creating clothes that I thought I would offer them for sale.  Most will be One-of-a- Kind pieces.  There will be contemporary and period clothing as well as costumes

I hope that my boutique items will appeal to both the Play Doll as well as the Collector Doll

Please contact me with your e-mail address so that you can be one of the first to see the introductory line of hand made doll clothes and accessories.

Ever curious,

Linda


Preserving Our Personal Heritage

 Our Stuff

This week two seemingly uneventful things occurred and converged into some interesting thought and introspection.  I was sorting through some boxes of personal items that I had collected and saved from my early years, and later in the week I went to a favorite antique mall to wander and enjoy.

 My precious boxes contained, in particular, linen handkerchiefs that were embellished with crocheted edges lovingly made in rainbow colors by my maternal grandmother.  Every Easter, my sister and I received these beautiful lacey treasures from Nana to put in our Sunday purses.  There were at least a dozen, clean but not ironed or folded in the particular way Nana did.  I caressed each and put them back in the box. 

 Later, as I walked through the vendor stalls that capture and display bits of the past, I had the usual responses – thoughts as to why someone would abandon these precious things to be purchased by perfect strangers, and to reminisce about familiar items that reminded me of a part of my childhood and heritage.

 As I sat here sipping a martini with four olives (veggies, an important part of the food triangle) I had a horrible thought!  More than likely, my beloved handkerchiefs would ultimately end up in an antique mall or in a land fill.  Having two sons, I never shared the story of my handkerchiefs with them, as you can imagine.  BUT – Now, I do have two granddaughters of my own.  As they are getting a little older, perhaps it is time to share the handkerchiefs and stories with them.  Then maybe,  just maybe their great grandmother’s handkerchiefs won’t end up in an antique mall for perfect strangers to wonder about.

 The moral of this story is to take every opportunity to share your precious items and memories with the next generation or at least put a short family history with the items so that when the time comes they can make their own judgment as to whether to keep or get rid of your precious stuff – and boy do I have stuff – my stuff and stuff from others. 

 We inherited many old items from my husband’s family home and unfortunately there is no family history to attach to some of them.  I know that his Mom and Dad were antique shop devotes, collecting the histories of others.  What are actually his family’s heirlooms, and what belonged to strangers is not clear.  Too bad – the cycle will probably continue.

 My mission is to start putting stories with our precious things or give them to the younger family members along with the history so that some day, maybe just maybe they will lovingly remember.

Ever curious,

Linda

Hand Quilting Primer

Hand Piecing – A Quilter’s Heritage
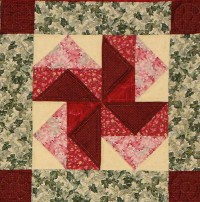
 

Besides the fact that Hand Piecing is where it all began,  there are several reasons to become adept at hand piecing.

  1. It is portable.  Hand Piecing can be done anywhere that a needle and thread can be used.  You don’t have to sit at a sewing machine or have an iron handy.
  2. The technique is basic to the core,  slow and therefore very relaxing.
  3. The results are charming and very satisfying.

The equipment list can be as basic as you want it to be.

A block pattern and a color scheme.  There are a bazillion quilt block patterns out there and always the option to create your own.  Personally I like the traditional blocks – they make me feel closer to the women who used them to cover their families from the chilly nights.  The one pictured is usually called Duchman’s Puzzle.

Each block has its own elements which require each different piece to have its own pattern (plastic or cardboard) or dimensions and instructions to rotary cut.  Patterns and rotary cutting dimensions should including the ¼ inch seam allowance.

Fabric – 100% Cotton is traditional and is easy to work with as it holds its shape and takes a crease well.

Sewing needles (some quilters use quilting betweens to piece.  It is a good way to get the feel of a between before trying to hand quilt).  Betweens are short, stout and sharp but any needle you are comfortable using is great.

A good quality cotton sewing thread.  You do not want to use quilting thread to piece.  Regular cotton sewing thread is strong and does not take up any extra room in the seam allowance.  This makes for a nice crisp seam.  A single strand of thread is used – do not double it.

Good fabric shears and small scissors for cutting thread.  Today, most quilters use a rotary cutter for cutting pieces.  I learned with scissors and plastic pattern pieces.  No rotary mat required, only a piece of fine sandpaper to hold the fabric while you mark it.

Marking pencils and a ruler with ¼ inch marks along its length – a quilter’s ruler is perfect.  I use a very sharp regular pencil on medium and light fabrics and a yellow pencil on dark fabrics.  It is very important to be able to see the marked lines and corner dots easily.  Marking lines are drawn on the back of the fabric as the piecing is done with right sides together.

Cutting

 Trace around your plastic pattern pieces and cut out each piece from the specified fabric or using dimensions and a rotary cutter.  Note:  Be sure that odd shaped pieces which are mirror imaged are being cut so that they face the correct way when assembled into the patch. Do not use selvage edges as they do not always lay flat.

Marking

 Your pattern pieces or rotary cut dimensions included the ¼ inch seam allowance.  Now those allowances need to be marked as these are your sewing lines. Make nice dots at the intersection of the lines at the corners.  Rotary cutting and machine piecing using a quarter inch foot on your sewing machine is very fast, but we are looking for slow and quiet.

Take your time and lay each piece right side down on the sandpaper and using your ruler draw lines a quarter inch from the edge of the fabric and dots at the corners.  Try to keep your pencil sharp so that the lines do not get progressively fatter.  If you can’t stand the slow pace of this method, write to me and I will give you my slightly faster method.  I think that it is important to try this way first because it gives you the opportunity to really get to know your ¼ inch seam allowance.  After a while, you will instinctively know when you are off course.  In my first quilting class we used finished size patterns and drew the ¼ inch lines around them before cutting out the pieces.  I found this very tedious but effective.  Try it yourself.  Note:  Finished size does not include a seam allowance.


Construction – Sewing the pieces into patches and then blocks.

Sewing

The pieces are joined with cotton sewing thread, right sides together.  A medium gray thread works really well with all colors both light and dark for piecing.  You will be using the same thread throughout the piecing project.  The stitch used is a very simple running stitch (———–) how easy is that!  Using a single thread and keeping your stitches fairly small, stitch from corner dots across to the corner dots checking on the back to make sure you are sewing on both lines.  Pinning the end dots can be helpful but be sure not to skew the lines.  Pins should be at a right angle to the sewing line.  At the end you can fasten off the thread and cut it or take a couple of back stitches and continue on with the next piece.  Now and then you can take a back stitch in the middle of a line which will help the pieces from coming completely apart if the thread breaks later on in your quilt’s life.  This will make a nice strong seam.

When you have finished assembling the pieces into patches, finger press the seams to one side. (General rule is press to the darker fabric so there is no shadowing of dark fabric through light colors.)  Quilt seams are almost never pressed open as in garment sewing.  Note:  When you reach a corner and you are going to attach another piece, be sure you match and stitch through the dots – do not catch any of the seam allowances in your stitches.  The little points at the corners should be free to flare around like a pinwheel.  By stitching the dots exactly you will be able to piece the Dreaded  Y  seam with ease – unlike on a sewing machine.

How a Pieced Quilt is Constructed

Pieced Quilts are constructed in Blocks which contain Patches usually in combinations of threes or fours. Hence the Three Patch Block, Four Patch, Six and so on.  The Patches are the small elements that create the Block.  Each Patch is constructed or in some cases it is a single element, and it is then joined to the next patch across the row.  Most patches make squares or rectangles that join easily with each other patch to make a row.  As each row is completed it is set aside until all the rows for the block are complete.  Using a square of Styrofoam covered with a piece of cotton flannel works great to keep each piece in its proper place until the block is finished.

The rows are then joined making sure that seams match exactly until the block is complete.  Blocks are joined in rows and rows are joined to complete the pieced quilt top.

_ _ _ _   Row 1

_ _ _ _   Row 2

_ _ _ _   Row 3

Start small and simple and have fun.

Ever Curious,

Linda